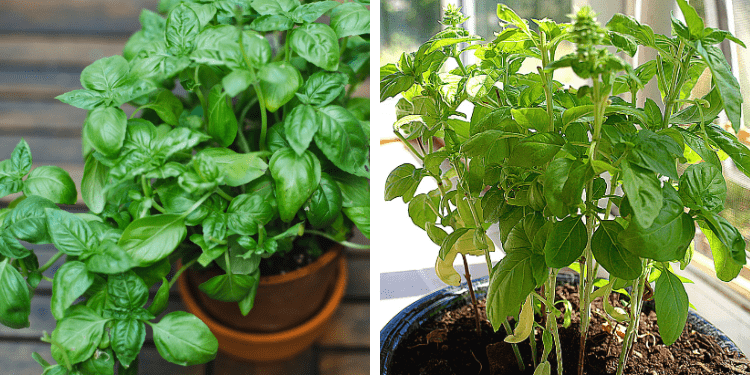
Basil is one of the most rewarding herbs to grow in containers, offering an abundance of fresh, fragrant leaves that can be used in countless culinary dishes.
Whether you have a sunny windowsill, balcony, or patio, growing big, healthy basil in a pot is entirely achievable—even for beginners.
With the right care, basil can thrive in containers and provide a generous harvest throughout the growing season.
In this step-by-step guide, you’ll learn exactly how to grow lush, bushy basil in pots, from choosing the right variety to harvesting for maximum yield.
Why Grow Basil in a Pot?
Container gardening offers several advantages for growing basil:
- Mobility: You can move pots to catch the best sunlight or bring them indoors in cool weather.
- Control: Pots allow for better soil control, drainage, and moisture management.
- Accessibility: Perfect for small spaces like balconies, patios, or kitchen counters.
Basil grows quickly and thrives in warm weather, making it a perfect candidate for potted cultivation. With the right setup, you can enjoy large, healthy basil plants in just a few weeks.
Step 1: Choose the Right Basil Variety
There are many basil varieties, and some are better suited for containers than others.
For large, flavorful leaves and vigorous growth, consider the following types:
- Genovese Basil: Classic Italian basil with large, aromatic leaves.
- Sweet Basil: A popular variety for pesto and cooking.
- Lettuce Leaf Basil: Broad, crinkled leaves and mild flavor.
- Spicy Globe Basil: Compact, round plant ideal for smaller pots.
- Thai Basil: Strong, licorice-like flavor with purple stems.
For growing big basil in pots, Genovese and Sweet Basil are top choices due to their size and productivity.
Step 2: Select the Right Container
Basil develops a moderate root system, so it needs room to grow. A container that is too small will stunt growth and limit leaf production.
- Container size: Use a pot that is at least 10–12 inches deep and 8–12 inches wide per plant.
- Material: Terracotta, ceramic, or plastic pots are all suitable, but ensure they have drainage holes.
- Drainage: Good drainage is essential. Avoid containers without holes, or root rot can occur.
If you’re growing multiple plants, use a larger planter box or separate individual pots to give each plant adequate space.
Step 3: Use the Best Soil for Basil
Basil needs loose, nutrient-rich soil that drains well while retaining moisture. Regular garden soil is too heavy for container gardening.
- Soil mix: Use a high-quality potting mix that contains peat moss or coco coir, perlite, and compost.
- pH range: Basil prefers slightly acidic to neutral soil (pH 6.0–7.0).
- Nutrients: Mix in organic compost or a balanced slow-release fertilizer to support early growth.
Avoid compacted or clay-based soils, which retain too much moisture and reduce root aeration.
Step 4: Plant Basil Properly
You can grow basil from seeds or starter transplants from a nursery. Both methods work well in containers.
From seed:
- Fill the pot with moist potting mix.
- Sow seeds ¼ inch deep, spacing them about 3 inches apart.
- Lightly cover with soil and mist to keep moist.
- Basil seeds germinate in 5–10 days when temperatures are between 70–85°F.
From transplant:
- Gently remove the basil plant from its nursery pot.
- Loosen roots and plant in the container at the same depth it was growing.
- Firm the soil and water well after planting.
Always place the container in a sunny spot immediately after planting.
Step 5: Provide Full Sunlight
Basil loves heat and thrives in full sun. The more light it receives, the bushier and more productive it will become.
- Sun requirements: Provide 6–8 hours of direct sunlight daily.
- Indoors: Place pots near a south-facing window or use a grow light for 12–14 hours per day.
- Outdoors: Place the container in a sunny, sheltered location protected from strong wind.
If your basil appears leggy or pale, it’s likely not getting enough light.
Step 6: Water Consistently and Correctly
Basil enjoys evenly moist soil, but overwatering is a common mistake that leads to root rot and fungal diseases.
- Watering frequency: Water when the top inch of soil feels dry. This may be daily in hot weather.
- Method: Water the base of the plant rather than the leaves to reduce disease risk.
- Drainage check: Make sure water flows freely from the bottom of the pot. Empty saucers after watering to avoid soggy roots.
Inconsistent watering causes leaf curl, yellowing, and reduced growth, so develop a watering routine.
Step 7: Fertilize for Big Growth
To grow big, lush basil plants, regular feeding is essential. Over-fertilizing, however, can reduce flavor and make plants leggy.
- Start with compost or organic matter mixed into the soil.
- Use a balanced liquid fertilizer (10-10-10 or 5-10-5) every 2–4 weeks.
- Alternatively, apply a slow-release organic fertilizer at planting and again mid-season.
- For an organic approach, fish emulsion or diluted compost tea works well.
Avoid high-nitrogen fertilizers that encourage leafy growth at the expense of essential oils and flavor.
Step 8: Prune and Harvest Regularly
One of the most important steps in growing big basil is regular pruning. Basil grows bigger and bushier the more you cut it.
- Begin harvesting when the plant has 6–8 true leaves.
- Pinch off the top 1–2 inches just above a pair of leaf nodes.
- Always harvest above a leaf node to encourage branching.
- Remove flowers as soon as they appear to keep the plant focused on leaf production.
Frequent pruning not only improves flavor and yield but also extends the plant’s life by preventing it from going to seed.
Step 9: Monitor for Pests and Diseases
While basil is relatively easy to grow, it is susceptible to a few pests and fungal issues.
- Aphids, whiteflies, and spider mites may infest basil. Spray with neem oil or insecticidal soap.
- Fungal diseases like downy mildew and root rot can be prevented with good air circulation and proper watering.
- Remove yellowing or damaged leaves and inspect plants regularly.
Keep the area around the container clean and dry, and avoid overhead watering whenever possible.
Step 10: Extend the Harvest
Basil is an annual in most climates, but you can prolong your harvest with a few techniques:
- Grow indoors on a sunny windowsill once temperatures drop below 50°F.
- Succession planting: Start a new basil plant every 4–6 weeks for a continuous supply.
- Overwintering: Take stem cuttings in late summer and root them in water indoors for fresh basil through winter.
Basil grown indoors still needs plenty of light and consistent care to produce well.
Growing big basil in a pot is a simple yet satisfying gardening project.
With the right variety, soil, sun, and care, you can produce robust, bushy basil plants bursting with flavor.
Whether you’re using it for pesto, salads, sauces, or garnishing dishes, there’s nothing quite like harvesting your own fresh basil.
Follow the steps in this guide to transform a single pot into a thriving basil plant that keeps giving all season long.
By understanding basil’s specific needs and responding with consistent care, even novice gardeners can enjoy healthy, vigorous basil plants in containers.